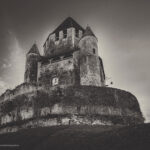
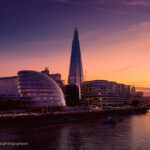
HDR photography? Would you like to find out more, put all the chances on your side and create the best HDR image? Then welcome to this dedicated article in which I offer a few tips! 🤓
What is HDR photography?
HDR or High Dynamic Range photographyis a technique for capturing and merging several images with different exposures. to create a single photo that is balanced in terms of brightness and contrast. The definition is relatively simple, but ...
Why and when should this technique be used?
This technique is necessary for high-contrast scenes and produces more dynamic and detailed results.. By combining the different exposures, HDR photography makes it possible to preserve all the very light and very dark areas (of a landscape, for example, where the light cannot be controlled).
If not, or you have to sacrifice the highlights, which end up "burning out". or sacrificing shadows that end up as black "plugs. In either case, no information will be captured, so there will be nothing to print for these areas. HDR saves us from these sacrifices! 🥳
Now let's take a look at how to go about it, and as always in photography, it all starts when you take the shot.
Capture in the field
As explained in the definition, HDR photography is a fusion of several images at different exposures! So we'll need several shots of the same scene at different exposures.
1. Number of images
You will generally needat least three images to handle most high dynamic range scenes, 5 or even 7 for greater safety at the start if you are unsure or if the scene is hyper-constrasted (facing the sun, for example)
For exposure, most software developers recommend 3 images: one underexposed by 2 f-stops, one correctly exposed and one overexposed by 2 f-stops.
Personally, I always take 5 images with only 1 f-stop between them. I have more images to manage but I find that software (whatever it is) produces a better result and if I ever decide to do a manual merge in Photoshop (via TK9 and luminance masks, for example) beyond 1 f-stop the rendering is not beautiful! ( but that's my opinion 🤓 )
2. Other box settings
ISO You should set your camera to a fixed ISO sensitivity, as low as possible, to limit noise. Even if software has become excellent, when merging, noise tends to be increased.
Focus : Manual focusing is recommended to ensure that all images are focused at exactly the same distance.
Bracketing program Exposure bracketing: many cameras now have an exposure bracketing programme. Make the most of it - it's exactly what it's designed for. Set to 3 images with 2EV separation or do as I did 😜, 5 images with 1EV separation.
Bracketing order You can do as you like, as long as you remember! You can use the metadata where everything is indicated. Personally, I organise my captures by -, 0 and +.
Tripod Use of a tripod is strongly recommended. Some modern cameras with bracketing and image stabilisation programmes can be used, but depending on the exposure time it is always more comfortable and safer in the end.
NOTE : As far as possible, please avoid moving objects such as people, cars, branches moving in the wind, etc. (this will mean less work for software deghosting).
I think we've covered everything there is to know about field capture, so leave a comment if I've missed anything...
Creating HDR in post-production software
Now let's look at merging RAW images into an HDR file in post-production software such as Lightroom / Capture One / On1 Photo Raw / Nik HDR Efex: (as you can see, there's a lot to choose from 🤪 )
Now you can validate and launch the merge, After a few moments you will generally obtain a linear DNG that behaves like a RAW file for subsequent editing in the software of your choice.
It's always useful to know ...
If you have opted for automatic adjustment of your merged file, you can change it all again at a later date. the settings will be visible in your software.
Automatic alignment will also align images that are not perfectly aligned. This makes it possible to shoot without a tripod. However, this is not a problem, even images taken using a tripod will generally benefit from this automatic alignment, as misalignment at pixel level could result in a loss of quality. Automatic alignment is always an advantage.
Depending on your equipment, the number of images and the resolution, the merging process may take some time..
If you want to convert your DNG file to PSD for further editing in Adobe Photoshop, please take into account the file size limitations of your cataloguing software. For example, C1 does not yet support PSB files.
If you wish to include lens correction in HDR photography, the selected images must have identical lens correction settings previously selected or applied.
If pixelated artefacts appear on your HDR merge, consider using fewer images in the merge.
Sometimes there is also a "deghosting" option. . This makes it possible to find out what has moved between the images in order to choose one of the images as a reference for this zone and not generate a fusion of this zone. (the movement of tree branches in the wind, for example, but this is limited).
There you have it, I think you should have a good basis here for getting started with HDR photography, if you think there are a few things missing or if you have any questions leave a comment, I'll answer them as quickly as possible.
If you would like to read more in terms of field capture I invite you to visit this category of articles, for my training courses on Capture and On1 Photo Raw here ,
See you soon on my blog and enjoy the photos,
David

