Updated on January 1, 2024
DODGING and BURNING, essential photography techniques!
DODGING and BURNING techniques originated in analogue photography and were used to correct and adjust exposure in particular areas before printing. In other words, DODGING is a technique lightening and BURNING a technique darkening.
But what is the purpose of using these techniques? DODGING and BURNING are used in all types of photography to sculpt, create depth in a portrait or landscape or an outline or more 3D on an object in order to create a more impactful and emotional image.
With skill and practice, you can profoundly change the way an image feels to the viewer. You'll be able to improve the way light bounces, reflects, and gives depth of life to a two-dimensional photo! In fact, this is what painters train to master at the beginning of their learning process. In the photographic world, it's no different for retouchers!
On a Raw photo, we all start by making a few global adjustments to refine the exposure, recover the highlights if necessary, as well as the shadows, blacks and whites, etc ... Tone correction is really just a 'sort of' overall DODGING and BURNING of an image.
But what I want to discuss here is how to apply it locally, using a graphics tablet with its stylus in your RAW converter, in Photoshop or even in Photoshop using luminosity masks, and how to choose between these different ways of applying these effects effectively.
First of all, we need to understand how light and shadow work with each other.
Understanding light and shadow ...
The closest areas affected by direct light are the brightest.
on a photo. The opposite, the unlit areas are the darkest part of the shadowswhich can be black or very close to black. You also have cast shadowsA fairly dark area, but made by an object and close to this object. Between these two extremities, you have the semitones or midtones, who are transition tones between highlights and shadows. These mid-tones are generally gradations.
Depth in an image
Depending on what we want to achieve with an image, we will use the Dodging and Burning techniques differently.
To even out a surface and make it smooth and flat, in 2D we reduce the light tones and shadows towards the mid-tones as much as possible. Or even more, perhaps reducing the existing gradient in the mid-tones.
To create depth in an imageFor more 3D, we'll do the opposite. We're going to pull the light mid-tones towards the whites, and the shadows towards the blacks. And so increase the gradient in the mid-tones... in other words, improve the contrast of the image by creating a wider range in the mid-tones. Technically, there are many ways of doing this...
DODGE and BURN in Lightroom, On1 Photo RAW or Capture One
I think this is the quickest way to apply the DODGING and BURNING techniques. Most Raw processors now offer local adjustment tools.
Generally speaking, to darken, the photographer uses the brush tool and paints over the desired areas of the image after reducing the exposureor the highlights slider, for example.
To make things clearer, we're going to increase the values of these same sliders.
To save time
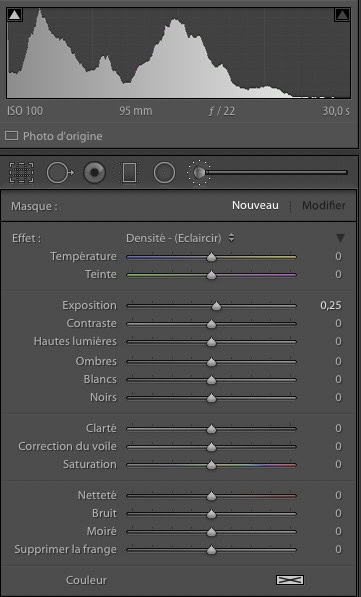
In Lightroom, In the brush tool, you will find the density - (lighten) and density + (darken) presets.
In Capture One Pro 21Now you have brush styles; select your brush and paint, and the layer and preset will be applied automatically. To find out more, click here, I invite you to watch this video.
In On1 Photo RAW, you have several solutions, with luminance masks, or with the local retouching brush.
Here's how to use luminance masks on On1 Photo RAW a video from my YouTube channel to which you can subscribe 😉.
How do I apply Dodging and Burning in Photoshop?
There are several ways of doing this in Photoshop. The simplest is to use the Density + and Density - tools on a layer copy of your image.
Or, on the same principle, you can create a layer filled with 50% greyscale in soft light blend mode and use the same tools.

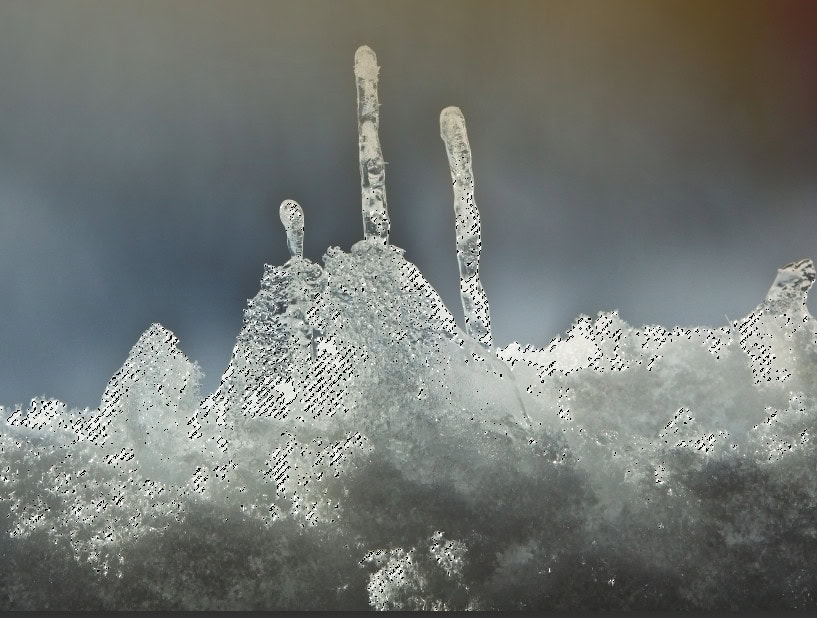
Even better, instead of using Photoshop's Density + and - tools in soft light mode, you can use the brush with a shade of grey on it. With a grey darker than 50% luminance, you darken and with a lighter grey, you lighten. At this point, you might ask, what's the point of this?
Well, there are 2 advantages with this method: the first is that you can always go back and paint with a 50% luminance grey which will cancel out the light and dark you've done on your layer, and only where you want. Secondly, you can use a colour other than grey to subtly apply colour to your image. Here for the " dodging colour" you must use a colour with more than 50% luminance and for " colour burning "Less than 50%. We're getting closer to painters' techniques here. (And you can always play with opacity and brush flow in Photoshop's options bar.)
A reminder: soft light mode allows you to maintain the contrast of the overall image, while the grey layer is invisible.
Dodging and Burning in Photoshop using luminance masks?
Let's say you're using the Photoshop panel TKActions RapidMask 2 by Tony Kuyper.
With Rapid Mask 2, you can create a selection, hide it but keep it activated (ctrl or cmd H), and you can paint through this selection using the greyscale technique described above.
Doing this through selection is a refinement of Dodging and Burning, because with Rapid Mask 2, you make a selection of a range of pixel luminance to darken and lighten.
This has the effect of darkening and lightening the areas where you are painting with the selected luminance range back-limited. In this way, your DODGING and BURNING becomes very subtle, natural, invisible but real. (comparing before and after).
Also, remember, you can use this technique, with the brush with one colour, over a layer of 50% grey in soft light mode to apply a subtle colour effect and as you now know, through a luminance mask.
Don't forget that you can play with the opacity of the layer and the opacity and flow of the brush too!
Watch the video below!
History brush for Dodging and Burning in Photoshop
For advanced Photoshop users, I've selected 3 videos from my YouTube channel, using original and rather unusual techniques for Dodging and Burning using the history brush!
Dodge and Burn Technique of Excellence - Part-1
History brush on Photophop - Part-2
Technique d'excellence avancée - Part-3 history brush
Thanks to Alister Benn, author of this technique.
Well, I think we've seen the main thing about the few Dodging and Burning techniques I use. I hope you find it useful. I know there are other ways to do this in Photoshop but I can't describe them all in this article which would be endless 🤓.
Having said that, you can go here for other post-production techniques,
See you soon,
David

