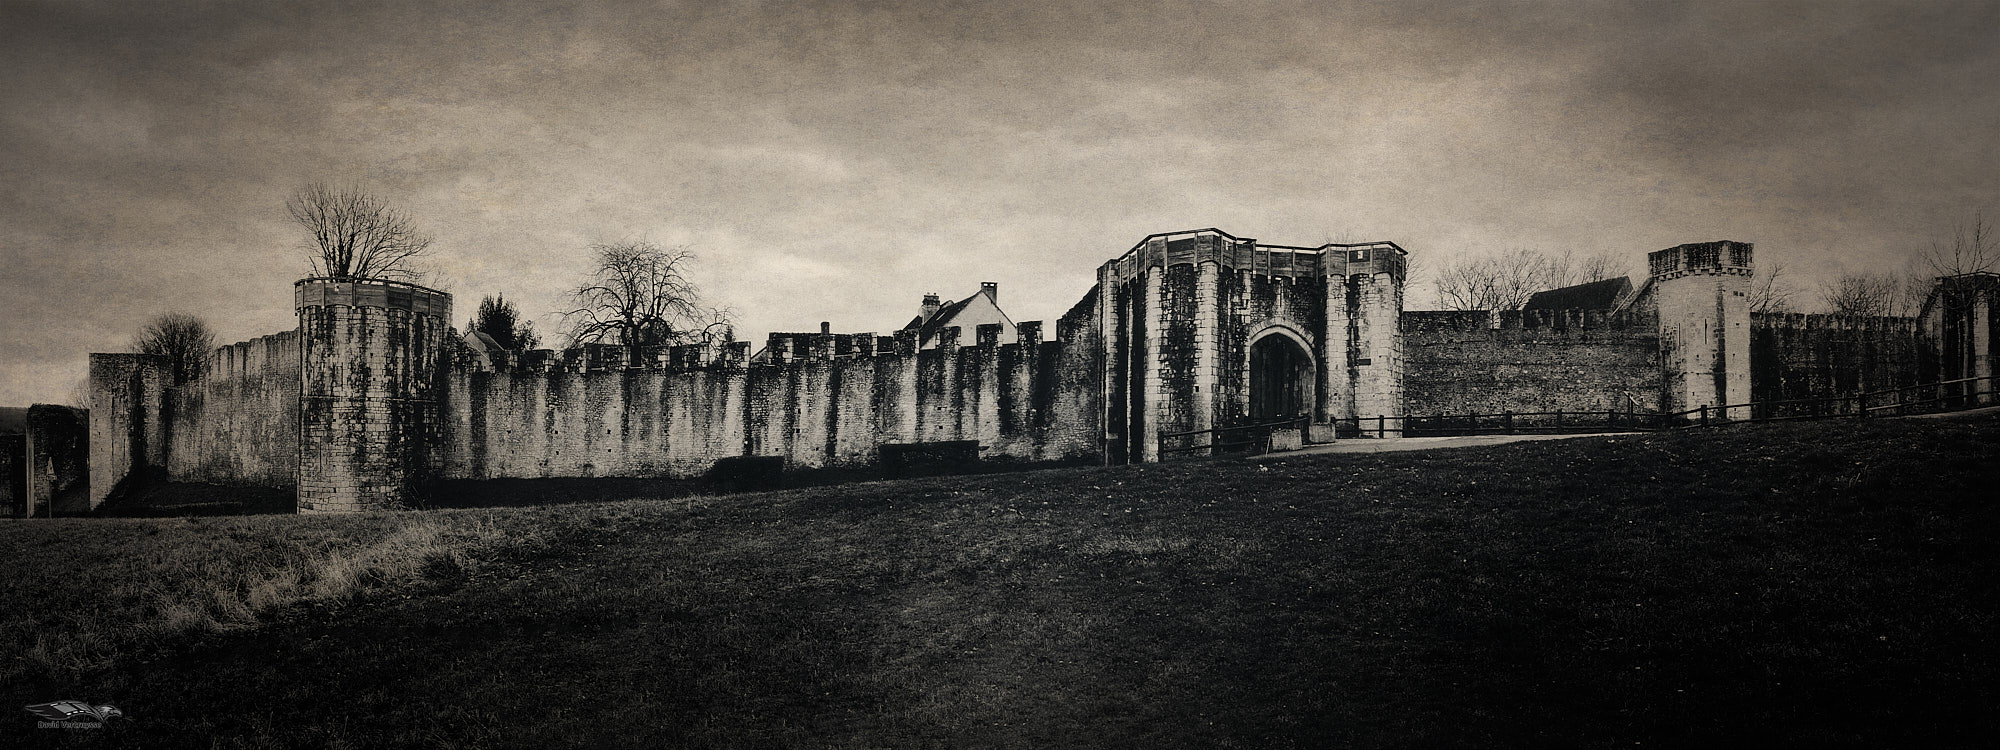
In this article, I invite you to step into the world of panoramic photography, you know those big, long, elongated photos 😅! And if you want to capture them yourself, then you've come to the right place. Here are a few handy tips for creating your panoramic images simply. We're mainly talking about panoramic photos here, but it's just as valid for vectoramic, the vertical version.
1. Panoramic and vectoramic?
Generally speaking a panoramic, full-length photo with little height! A bit like the 16:9 cinema format.As soon as the photo is twice as long as it is high, you're in for a panoramic view 😅! Beyond that, it's even more panoramic!
Of course, if we turn the camera vertically, we get our vectoramic photo, which is very narrow in width and very tall (a portrait version in short, which can be useful for photos of skyscrapers, for example). Now we know what we're talking about, let's see when and why use this photo format?
2. Why take a panoramic photo?
I can think of at least 3 reasons to take a panoramic photograph;
The 1era and the most obvious, is to bring in a grandiose, sweeping landscape, called the a panorama in a single image. A mountain range, a seaside bay, etc. In this case, we start with a photo taken with a wide-angle lens, or even an ultra-wide-angle lens.
The 2nd to increase the size and resolution of a photo. In fact, this is much less of a problem these days, with the resolution of our sensors getting higher and higher in the pixels. stitching together a number of captured photos to produce a large image with a high level of detail and that's still true today. The fact is, It's the purpose for which the photo is taken that determines the capture technique.
In other words, if you have a medium-resolution camera, and you want to make a huge souvenir poster on your living room wall, this will be a simple and effective solution.
The 3th and last reason in my opinion is be able to shoot at 180° or more and put it all together in a single image. And with minimal distortion. The more you use an ultra-wide-angle lens (fisheye, for example), the wider you'll go, but the resolution will be limited and the image will be very distorted (although optical correction software such as DxO Viewpoint is excellent), but the result will be better quality and more balanced with multiple photos stitched together.
3. What equipment do you need?
Use a tripod wherever possible. Make sure it is aligned horizontally to ensure that all the images in the series are aligned when you turn the tripod head.
There was a time when using a special panoramic tripod head was essential. Although this is still a plus, and makes it easier to assemble your different photos in the software, assembly technology has become so powerful that it's no longer essential.
But if you do a lot of panning, I'd still recommend a dedicated system. Allow the camera to rotate around the nodal point of the lens, guaranteeing that even objects located a short distance away will always fit together perfectly in the final panorama. (with the assurance of almost no sewing errors).
Concerning the objective, from 35mm to 50mm is fine. If the angle is too wide, there is a risk that the image will be too distorted, and this will quickly become difficult for the stitching software to correct. Distorted areas could persist once assembled and this is sometimes very visible. 😖
4. Capture advice
Here, the key is to have all the images with a certain degree of consistency, in terms of exposure (and indirectly colour).). This will make post-production and assembly much easier.
1/ To do this, I advise you to set your camera in manual mode with an aperture of around f/8 or f/11 and keep this aperture for all your photos. With this aperture the exposure will remain the same on all photos taken but not only that, having the same depth of field, the same sharpness on all your photos will be a plus and vignetting should be well limited at f/8. (Shoot one series at f/8 and another at f/11 and use the best 🤓.)
2/ Use manual focus to ensure that all the images are in focus and that they are focused at the same distance.
3/ Also, shoot well in Raw format. This will allow much greater flexibility to finely balance your images in the design software before assembly.
4/ In addition, overlap your images from 20 to 40%.You can use the fine grid activated on your camera or the graduations (if present) on your tripod or head.
5/ From there you can technically take as many photos as you want, even 2 or 3 layers of photosMany software packages (Lightroom or Capture One, for example) can handle this without any problem.
6/ And finally, turn/move around your camera and don't make the camera turn around you. That way you stay as close as possible to the nodal point. Even with your smartphone.
5. Creating a panoramic photo ?
The simplest way of making a panoramic or vectoramic image, is simply to use reframing. You take your captured photo as usual and in post-processing, in your development / retouching software, you crop with a 3:1 format!
But in this case, you have seriously cropped your image and lost a lot of material. This also implies that you have taken a wide-angle or very wide-angle photo.

Now let's look at the case where you want to create a very large format poster with lots of detail.
a. Tips for assembling a panoramic / vectoramic :
Prior to assembly, there are a few things to check, including optical distortion and vignetting. If this is not corrected before assembly, there will be tonal variations at each seam and the images will be distorted.
Of course, all this depends on the quality of our lenses, the shot itself etc... but the more finely this is corrected at source, the more you are guaranteed to have uniform transitions in the sky and other similar areas.
I'll go even further: inrawtisation software, there are often a slider for correcting sharpness loss for the edges of the image, I'd also recommend using it to balance out the sharpness lost around the edges of your images (but gently, without abuse) which will will also even out the sharpness across your entire panorama. NB: Software such as DxO Photolab or DxO Pure Raw do this scientifically and automatically using powerful algorithms, greatly simplifying the work and producing excellent results.
The last parameter to pay attention to after synchronising the light, distortion, vignetting and loss of sharpness is the white balance. Synchronise and balance your white balance before you start. Finally, let's move on to assembly!
b. Assembling your photos into a panorama
Here we are at last, you can select all your prepared photos and send them for assembly. Lightroom, Capture One, Photomerge in Photoshop all have this stitching capability.. You can also use very powerful dedicated software such as PTGui if you make a lot of them, but it's an investment from the outset. Some are capable of HDR panoramas. My article on HDR photography is coming soon.
During assembly, you will be asked to choose options, so don't hesitate to test them and select the best rendering according to your preferences. The option found in all assembly software is projection.
Depending on the number of images and the field of view covered by your images, you can choose a projection (Lightroom or C1):
Spherical projection is useful for multi-row sewing with a wide field of vision both horizontally and vertically.
Cylindrical is useful for a single row of images covering a field of view of more than about 100 degrees. Vertical lines remain vertical thanks to this projection.
Projection in perspective aims to simulate the field of vision corresponding to a wide-angle lens. This projection is also useful for a field of view of less than about 100 degrees and/or with images captured with tilt lenses.
Panini is useful for architecture where the vanishing point is in the centre of the frame. Vertical lines remain vertical and lines going towards the vanishing point remain intact thanks to this projection.
Congratulations, your panoramic or vectoramic is finally complete 😍 !
6. Miscellaneous comments
If the resolution or number of input images is high, this will result in a fairly large panorama (dng). This can sometimes be as high as 600 to 800 megapixels. Don't hesitate to crop your panoramas. As the resolution is high, this leaves a lot of margin and will prevent your software/computer from suffering from slowdowns and you will be able to continue developing/retouching with too little 'response time' from the cursors. (even if all this is becoming increasingly imperceptible with today's performance).
In Capture One, for example, you can choose to reduce the image to 25 %, 50 % or 75 %.
If you are converting your dng file to PSD for editing in Adobe Photoshop, take into account the file limitations of the PSD format It has a maximum height and width of 30,000 pixels and a size limit of two gigabytes . If the resulting panorama becomes too large, reduce the resolution when you create it or export it in TIFF format. It is also possible to possible to use the PSB format, but only Lightroom currently supports this format for cataloguing.
That's it, I think there's more to say, but for now I think there's plenty to get you started and have fun creating your panoramas!
See you soon in pictures,
David

