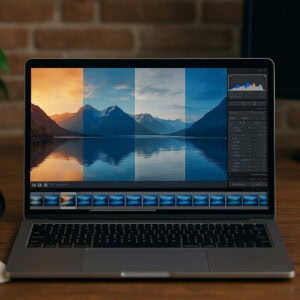
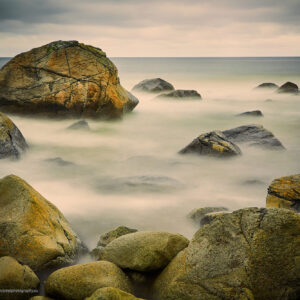
In this new article, I'd like to talk about digital noise. In this increasingly digital world, digital noise is an obstacle which can be found everywhere in everyday life, whether in photography, video or sound. But what is digital noise, and how do we deal with it as photographers? Let's explore the different forms of noise, and how to optimise the quality of our images.
What is digital noise?
Definition : Digital noiseis also known as "electronic noiseand refers to unwanted interference or random variations in electronic signals which affect the quality of digital images or videos. This phenomenon generally occurs during the capture, processing or transmission of digital data.
As we all know, digital noise manifests itself in 2 main forms in digital photography and videography:
Luminance noise Appears as random speckles in the image, mainly affecting brightness.
Chrominance noise : Appears in the form of abnormal colour variations in the image.
Why is digital noise a problem?
As mentioned above, noise is first and foremost a problem in terms of quality, and therefore the visual impact of our photos or videos. Of course, I'm talking about the technical quality of the photos, not the artistic quality (which is up to you to judge).
Influence on photo quality
We've all seen it in our photos: when the noise is really bad, the image has too much grain (luminance noise), colour oddities (chrominance noise) and ends up with a 'smudgy' image, as if grainy inks had gone 'over the edge'. This will be all the more noticeable in shadows or areas of gradation (skin, sky, etc.).
Effects on sharpness and detail
And if there's a lot of grain to the point of mottling, and too much colour variation, this leads to a significant loss of sharpness and detail. (Pretty annoying when you're a nature and travel photographer 😉 )
So the problem with noise is a loss of visual quality in photos or videos, as well as a loss of sharpness and detail.
Problems in post-production
Easier and easier to process in post-production with AI (artificial intelligence), of course, but noise can be complex and time-consuming to deal with. And if you overdo the noise reduction, you'll over-smooth, blur and "plasticize" the image, resulting in an even greater loss of detail 🧐 ! What's more depending on the development and retouching process, this will severely limit the possibilities, as the image will be degraded much more quickly. The removal of shadows, colour saturation and contrast, to take just a few examples, should be limited, otherwise your image will be damaged.
File size
This is not widely known, but files containing a lot of noise are more difficult to compress, and can generate larger files. Well, these days it may seem incidental, unless you process and manage a lot of photos, videos as a professional. It might be less of a nuisance for amateurs, though ... 😜 the more space you have, the more mess you make!
Professionally
This only applies to professionals, but it's essential for an image or video professional to provide his clients with only high-quality files. The visual quality of a brand, a company or a product is at stake, and needs to be highlighted. Otherwise it's totally counterproductive.
Now that we know what the problems with digital noise are, I'd like to take a look at the causes so that you can do something about them.
Before entering optimisation details to avoid digital noise, it's important to understand its causes. After that, it's just a matter of logical deduction during capture in the field or during post-production.
The causes of digital noise
So far, I have identified 4 major causes of noise:
Finally, now that we know the origins of the problem, let's talk remedies and solutions! There are several solutions that can be implemented, ranging from shooting techniques to the use of post-production software. Here are some of the best practices in my opinion 😜 :
Tips for reducing digital noise
1. Capture equipment
It's becoming more and more affordable these days, and you no longer need to aim for the top end of the pro range to get high-quality sensors! But investing in Cameras with good quality sensors will be better at capturing images with less noise, especially in low light.
Similarly, when it comes to lenses, the better they are in terms of overall build quality, and the wider the aperture, the better in low light. Use bright lenses with a wide aperture (small f/ number) will let in more light and reduce the need to increase ISO.
2. Use optimum ISO sensitivity
Use the lowest possible ISO sensitivity on your camera. A high ISO amplifies not only the signal but also the noise, as we saw in the causes.
3. Control exposure
Make sure your image is as well exposed as possible by adjusting the aperture, shutter speed and ISO. Underexposure will increase noise in the shadows when your image is brightened up in post-production. Hence the saying in photography to expose to the right, which means that your histogram should be as far to the right as possible when captured in the field (i.e. the clearest photo possible). without burning out the highlights !
Indoors, use sufficient good quality light. Adding light sources or using a flash can reduce the need to increase ISO.
4. Capture and shoot in Raw
Shoot in RAW rather than JPEG. RAW files contain raw information from your sensor and offer greater scope for noise reduction in post-production.
5. Use a tripod
Use a tripod for long exposures without increasing the ISOespecially in low light. Because you won't be pressed for time, the shutter can stay open for as long as you need to get all the light you need, without needing to increase the ISO.
6. Use noise reduction software
Nowadays AI-powered software works miracles, or almost miracles: old photos can be brought back to life 🤓 ! Use development software such as DxO PhotoLab or specialist noise reduction plugins, such as DxO PureRawAdobe Lightroom, Photoshop, Topaz... These tools can handle noise extremely well while preserving detail.
7. Post-production
And yes, other than using specialist post-production software, you can use local processing and retouching techniques. Working locally as much as possible in small, gradual steps will allow you to work on your image as little as possible and generate as little noise and artefacts as possible!
Another (old) one possible technique to use on a pixel editor (like Photoshop or Affinity Photo) is to combine several shots of the same scene, stack them into layers and then merge them using algorithms such as "median". (this is stacking)
Other methods not to be overlooked
1. clean your sensor
Make sure your camera sensor is always clean. Dust and dirt can contribute to digital noise.
2. Limit the temperature rise
Avoid overheating the sensors by using the camera in moderate temperatures. Heat can increase electronic noise. Cover your camera in summer and let it cool down between 2 long exposures as much as possible. Don't leave your camera in direct sunlight for too long.
3. If you shoot in jpeg
If, for any particular reason, you are shooting in Jpeg, activate the noise reduction function offered by your camera, especially for long-exposure shots.
Conclusion
Clearly, then, digital noise is a crucial aspect to manage in order to ensure the quality of images, videos (and audio recordings). (and audio recordings.)
By using quality equipment, adjusting our cameras correctly and applying appropriate techniques, we can minimise noise and obtain sharp, high-quality images and videos. Mastering these techniques is essential for any photographer or videographer wishing to improve the quality of their work.
We have clearly understood this in this article, Reducing digital noise is a combination of good practice both at the time of shooting and during post-production processing. Then all we have to do is practice 😎 and practice some more!!!
I've probably forgotten a few things on the subject so don't hesitate to leave me your opinion in the comments below, and if you'd like to read more about capture visit these articles or on post-production.
See you soon on Dragonstreet Photography and thank you for your visit,
Well photographed,
David

