Amateur, expert or professional, whether for business or pleasure, we all love photographing animals, and even more so our "favourite beasts". We all want to get the best possible photos!
In this article, I propose qome tips and tricks to improve your wildlife photography. We'll be talking here about the broad outlines that apply to all animals in general: wild, captive or pets.
1. The basics of wildlife photography
1. Getting to know the animals
When photographing wild animals, it's essential to know your targets. To a lesser extent, the same applies to captive animals (in zoos or reserves, for example). It is crucial to be able to answer the questions where? when? how? and above all: What image do I want to capture? This preparation will not only ensure you get some great shots, but also help you choose the right equipment. (In a zoo, meadow or reserve, the "where?" will obviously be easier to determine).
For example, knowing the circadian rhythms of the animals you wish to photograph is of great importance, if only to determine the time of your shot. This may seem obvious, but it's difficult to photograph nocturnal animals in broad daylight, and vice versa. 😁! Photographing inactive or sleeping animals can quickly become monotonous 😒.
To be more precise, know the times, periods or seasons for certain activities (hunting, fishing, feeding, reproduction, nesting, migration, etc.) will help you answer the questions you may have. Click on the "where" and "when" buttons to obtain the shots you want. This includes not only the time of day or night, but also the season or time of year, in relation to reproduction, changes in activity, migrations, etc.
It is also essential to think about the narrative aspect of your photographs. Isn't telling the story, the activity or the life of the animal you capture more captivating? The more you know about the animal, the more stories you'll be able to tell through your images. Photographing an animal in its natural habitat, in action or interacting with its environment, adds an extra dimension to your shots, making them richer and more expressive.. It could be a dramatic hunting scene, a mother feeding her young, or an animal migrating through magnificent landscapes.
The rarer or shyer the animal, the more difficult it is to photograph, and the more crucial it is to know its habits, behaviour and habitat. For example, knowing how to anticipate the movements of a predator can enable you to capture unique moments of hunting or socialisation within its pack. It can also help you to keep your distance so as not to disturb the animal or endanger your own safety.. What's more, knowing the stress or warning signals of certain species can help you avoid unpleasant surprises.
So, as you can see, a minimum knowledge of your target animals is essential. This will enable you to refine your expectations, optimise your chances of capturing stunning images and, above all, respect the animal and its environment by avoiding behaviour that is intrusive or harmful to wildlife.
2. Light is always the key
You'll hear this key concept in photography over and over again:
Light is everything!
This is particularly true of nature and landscape photography. Although it is possible to capture beautiful images at any time of day, moments when the light is soft and golden add extra atmosphere and emotion. If we have to give a general rule, Sunrise and sunset often offer magnificent light, both in terms of colour and the way the light is diffused in the atmosphere.
Overcast or stormy weather conditions can also offer great opportunities. The light is often softer, with fewer sharp contrasts and overly pronounced shadows, which can add a special atmosphere to your photos. Plus, during these times of the day, many animals begin or end their activitiesThese are particularly interesting times for wildlife photography. Even non-wild animals, such as those in parks or reserves, often follow a similar rhythm of life, making them interesting subjects at these times too.
That said, the quality of light does not depend solely on the time of day or the weather conditions. The angle of the light, its direction and its intensity also play a crucial role in the aesthetics of your images. Grazing light at sunrise or sunset can create long shadows, giving a dramatic effect and adding depth to your shots. Diffused light on a cloudy day softens contours and shadows, creating a softer, more balanced scene..
Another point to consider is the ability of light to influence colours.. During the golden hour (just after sunrise or just before sunset), warm hues dominate, reinforcing the reds, oranges and yellows, and creating a soothing, romantic atmosphere. Conversely, during the blue hour (just before sunrise or just after sunset), cold light produces bluer tones, giving a more intense light. a feeling of calm and serenity.
Finally, it's essential to remember that light is also a storytelling tool.. It can be used to guide the viewer's eye to a specific point in the photo, to create striking contrasts or to highlight textures and subtle details. Playing with light allows you to add emotional depth to your images, whether capturing a dramatic pre-storm sky or the softness of a landscape at dusk.
3. Adjust its height
What do we mean by "adjusting its height"? It's simply a question of adapting the height of your shots! While photos taken from a bird's-eye view or from a low angle can sometimes provide an interesting effect, photographing at the animal's height, or slightly above it, allows you to 'enter' the subject better and even highlight it. And isn't that precisely what we're trying to achieve in wildlife photography?
It's a bit like photographing children: when photos are taken from the height of an adult, they tend to create a certain distance from the viewer. On the other hand, by photographing at a child's height, we avoid a crushing effect and achieve a more immersive image. For animals, it's exactly the same. You'll have to crouch, kneel or even lie down. All you have to avoid is standing!
In fact, if you stand still, you'll quickly be spotted. Many animals recognise the human silhouette and are afraid of it. So if you want to capture a particular animal activity, you'll need to be as discreet as possible. This involves lying in wait, staying posted for long periods, often in uncomfortable positions, and above all camouflaging yourself, particularly for wild animals.
And by adjusting your height, you'll have the advantage of creating magnificent blurred backgrounds, that famous creamy bokeh that so many photographers dream of ! 😜 Good framing at animal height not only intensifies immersion in the scene, but also isolates the subject, highlighting its eyes or features while minimising distractions in the background.
Adjusting your position can also influence the way the light interacts with your subject. When you are at the animal's height, the light can illuminate its features more evenly, avoiding the unsightly shadows that a bird's-eye view might create.. This gives you more natural, balanced images, where the animal appears in all its splendour.
2. Advanced techniques and tips
4. Focus on the eyes, a key element
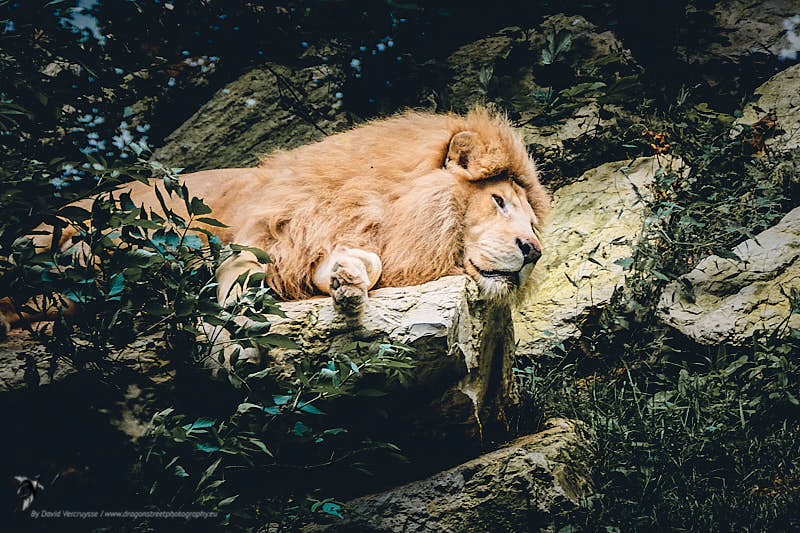
It may seem obvious to many, but it's always a good idea to remember a fundamental principle: "you have to focus on the eyes".. If the focus is not on the animal's eyes, it becomes very difficult to captivate the observer. The eyes are the natural focal point of any portrait image, whether of human beings or animals.. Even if the animal is moving, if the eyes are sharp and the rest of the image is slightly blurred, this can create a very satisfying, even artistic, visual effect.
Of course, the further away your subject is, the less strict this rule will be. In these cases, focusing on the eyes may have less impact, as the overall scene becomes more important. However, for close-up animal portraits, this rule is absolutely essential. The look is what brings the image to life and creates an emotional connection with the animal.. The viewer is naturally drawn to the eyes, which become the focal point of the portrait.
There are exceptions to this rule, however, particularly when photographing large marine animals such as whales or orcas.. In these cases, the importance of the eye can take a back seat to the scale and majesty of the animal's whole body. This type of photography often places more emphasis on overall shapes and movements than on the details of the eyes.
This need to focus on the eyes also leads to another fundamental principle of wildlife photography: detach the subject from the background as far as possible. A cluttered or too sharp background can distract from the main element of the photo, the animal itself. By isolating your subject with a good background blur, you focus attention on the details that matter, such as the animal's eyes, posture or characteristic features.
And finally.., controlling the focus on the eyes becomes even more crucial when you use wide-aperture lenses, which offer a reduced depth of field. This allows the eyes to be perfectly sharp while creating a magnificent blur around the rest of the image, which can make the animal even more expressive and lively. This type of framing gives power to the image and amplifies the emotion conveyed by the animal's gaze.
The big question now is: What settings should you use and how can you get a nice, blurred background?
5. Choosing and caring for your background
Let's move on to one of the keys to success in wildlife photography: taking care of the background. How do you control this all-important element?
First of all, this brings us back to the first point: get to know the animals. Knowing your subject will enable you to know where it is, when and under what conditions. By understanding its habits, you can anticipate its movements and choose the best position, taking into account the background you want to include in your composition.. This also means camouflaging yourself well and choosing your angles of view according to what you want to capture in the background.
In wildlife photography, if you are in an "action" shooting situationIf you're dealing with animals, such as animals in flight or running, you'll need to use the shutter speed priority mode (Tv). This mode allows you to adapt to the subject's speed, ensuring that the animal remains in focus despite its rapid movement.
However, if you're posted on the lookout, with more time to compose your image, you'll be able to take more control over your background. In these situations, I recommend using the aperture priority mode (Av), which lets you control the depth of field and therefore the degree of background blur. By mastering this parameter, you can isolate the subject and create a clear separation between it and the background, playing with soft focus effects.
By adjusting the aperture of your lens, as well as the distance between the subject and its background, you can intensify or reduce this blurred effect.. The wider you open the aperture (f/2.8, f/3.5, for example), the more your depth of field will be reduced, resulting in a pronounced blur both in front of and behind the subject. This not only allows you to focus all your attention on the animal, but also to hide potentially distracting details in the background.
Even when the background is blurred, it must be carefully chosen. It's not enough to make it indistinct: it's important to pay attention to the colours and contrasts between the subject and the background. A good colour contrast helps the animal to stand out, creating a more striking image. Of course, controlling the background in a natural environment is more difficult than in a studio, but that's also the charm of nature photography. It's this challenge that makes this art form so exciting! isn't it? 🤣 and I agree with you, it's not that simple on the ground!
And don't forget that a well-crafted background reinforces the story you want to tell with your photo.. Sometimes a slightly visible background, such as a landscape typical of the animal's habitat, can add context and depth to the image, while keeping the main subject in focus.
6. Framing
Overall, it is best to avoid framing too tightly. Of course, it all depends on your objective and the story you want to tell. It is essential to give enough space around the subject for the scene to be clearly understood. A wider framing allows the inclusion of contextual elements that provide additional information about the animal's environment, its behaviour or its interaction with the natural setting. By its very nature, an animal is on the move, and can change its trajectory or react suddenly. Leaving some space around the animal allows us to capture these unpredictable movements without having the impression that the animal is 'enclosed' in the image.
This free space is also part of the narrative: it tells the story of the animal, its attitude, its fears, its reflexes, while respecting its freedom. By not framing too tightly, you leave room for the animal to appear to evolve naturally in its habitat, without constraining it visually. This reinforces the idea that the animal is free, or at least not restricted in your photograph. An image that breathes gives the viewer a sense of space and dynamism, essential elements for conveying a complete story.
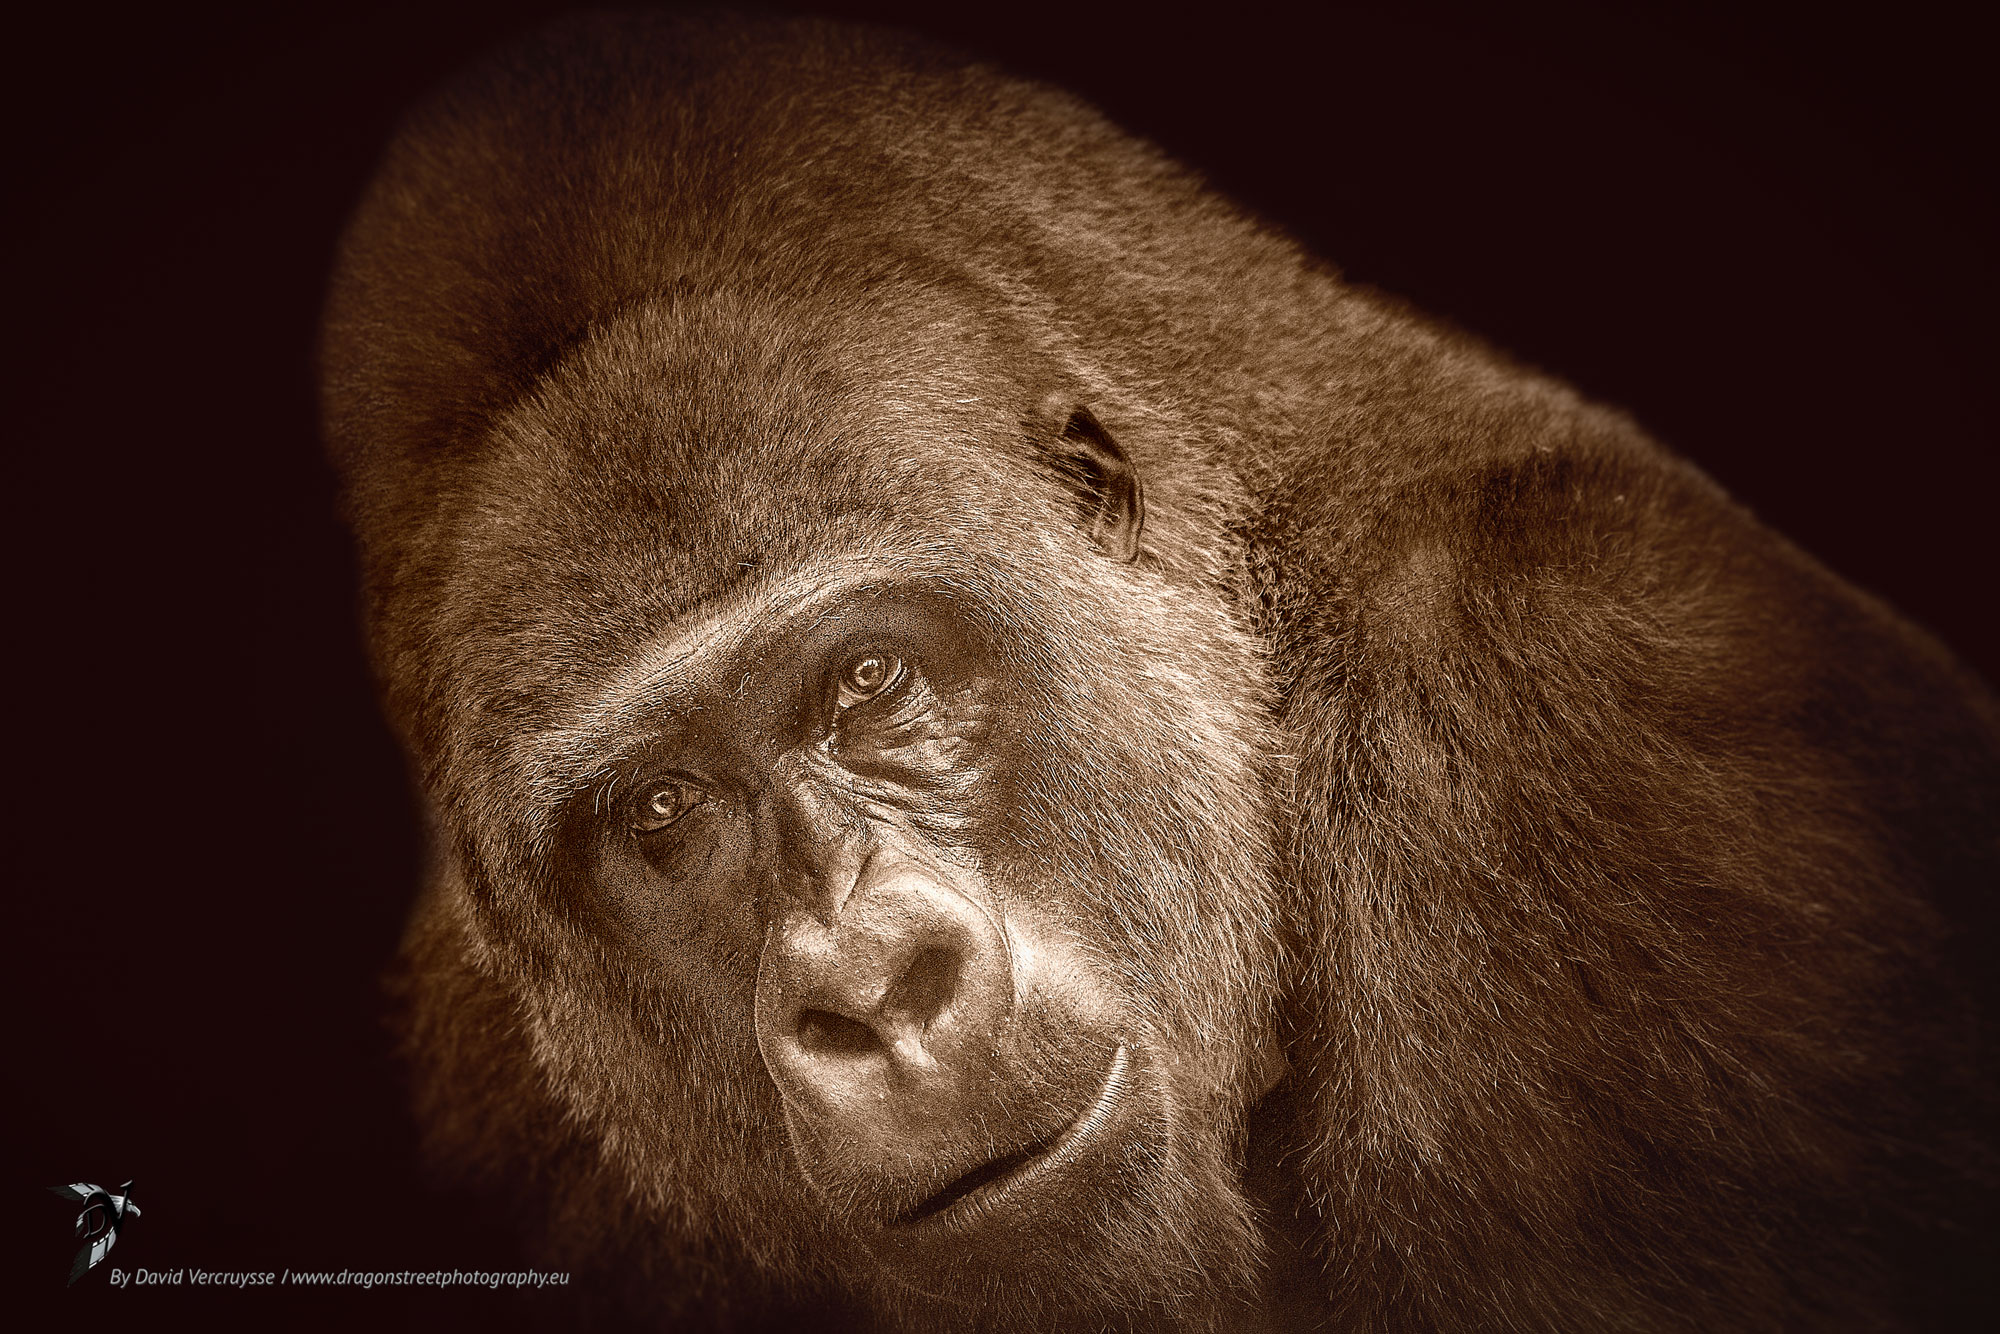
That said, there are times when tight framing is entirely appropriate, even necessary. For example, for an animal portrait, tight framing can highlight a specific attitude, a piercing gaze or a particular expression. (Like the photo on the front page of this article)
In this case, isolating these details allows you to focus all the attention on the animal's features, creating a more intimate and striking image.
Likewise, if you are photographing captive animals, a particular framing can be used to illustrate the impact of their confinement on their behaviour or psychology. By showing the bars of a cage or the boundaries of an enclosure, you can evoke feelings of sadness, frustration or isolation. Each type of framing tells a different story and adds an extra nuance to the image.
3. Conclusion
That's it, we've covered the six key points that, in my opinion, are essential for taking good animal photos. Of course, there are many other tips and techniques, and I'll be updating this article over time to share more of it. In the meantime, we'd like to offer you a moment of relaxation and reflection, I invite you to visit my animal gallery. Who knows, maybe you'll find inspiration for your next shoot!
Good capture to you photographer,
See you soon
David

